
Well I didn't get to ride the bike at the weekend (got my fitness fix from 5 laps of Drayton's running track instead) so I decided I would have a crack at my idea for a replacement tensioner.
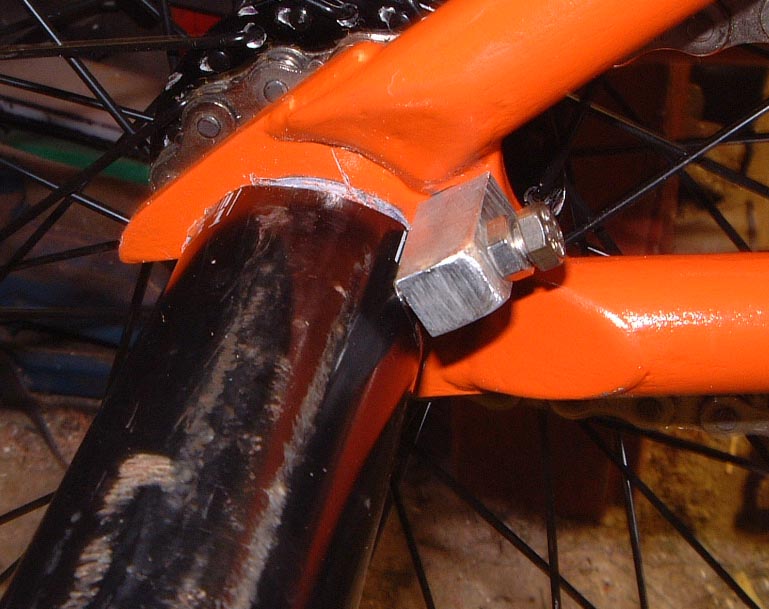
My existing tensioner, a Primo Venus, weighs about the same as my back wheel so it's gotta go, replaced with a little push screw affair that I fab'd at my pops place:

This 'test' version is made from ally, so I'm not holding out that it's going to last. I wanted to see if the idea would work for now...

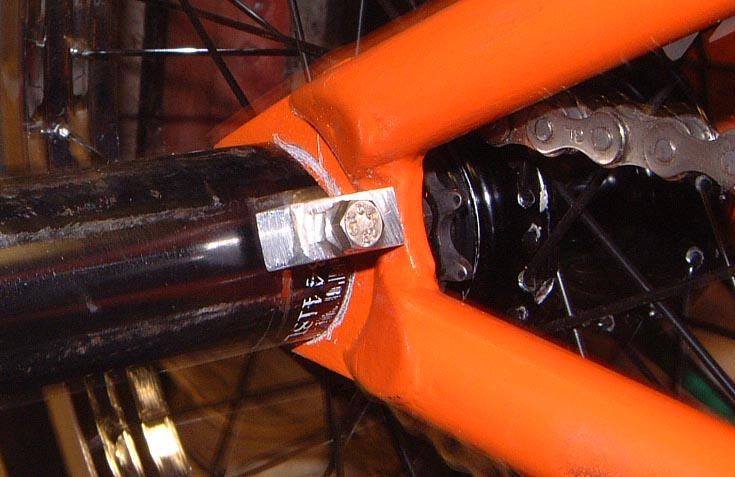
I used the cut-out in the back of the dropout to screw the tensioner to the frame then drilled & tapped another hole for the screw to push the peg back in the frame.

My existing tensioner, a Primo Venus, weighs about the same as my back wheel so it's gotta go, replaced with a little push screw affair that I fab'd at my pops place:
This 'test' version is made from ally, so I'm not holding out that it's going to last. I wanted to see if the idea would work for now...

I used the cut-out in the back of the dropout to screw the tensioner to the frame then drilled & tapped another hole for the screw to push the peg back in the frame.
I think that because of the amount the tensioner sticks out, the leverage on it will fuck it up sooner rather than later but it was fun to have a go at it. I am going to make a steel (or Ti if I can find some) 'L' shaped one next using the same design principals & I was also thinking about modding my peg so that the tensioner is built into that...
your thoughts...

good prototype.... i've got a good sized slab of grade 6 titaniumie if you need some, your problems gona be machining it, coz really you need an high grade tungstun carbide to drill,tap & machine, I have some ti drills that may be up for the job(if loads of cutting fluid is used and the cutting is done real slow)needs to be on a good piiler drill aswell..... i've always thought about a small grub screw drilled n taped into the back of the dropout slot,but it creates some asre about face assembly probs.. at the mo I just torque my wheel nuts up to around 100lbs or so (ti axle & nuts) don't get any probs with that other than the need to carry a torque rench around in my car!!
ReplyDeletethinking about it more if you use small nuts and bolts you could reduce the size and there for the leverage,i've got a large selection of nuts n bolts so we could do with getting to gether and thrashing some ideas out...... has anyone got the use of a machine shop? coz like many i've got like 20 ideas for parts!!
ReplyDeletewww.flybikesbmx.com/noticias/images/3amigosframe10.jpg
ReplyDeleteThis would be perfect!
yea, that'd do the job, or without wanting to state the obvious too much, if you run the bolt that's pushing against your peg as close to the fram as poss, it'll have a bunch less stress on it.
ReplyDeleteThat+maybe taking the mount thing bit through to the inside of the frame and running a reasonably big washer jobbie on that side. Would help keep things straight. Maybe
the reason I couldn't run it up closer was because I had to drill & thread into the ally piece deep enough (12mm) to bolt it through the dropout 1st & then drill the other whole for the screw to push the peg dude...
ReplyDeleteAhh right, I was thinking of it the other way round, like the block of aluminium had like a threaded peg on the end and that went into/through the hole........
ReplyDeleteOk, you win, can't think of a way around it without getting a little "L" shaped bit like that pic on the fly site. You could make a bit like that, if you started with a square(ish) bit of metal, drilled the holes, then took a grinder or something(if there's a better bit of equipment available?) to it and took that corner bit off, then tapped it..... still gonna be a pain in arse getting low profile nut/bolt thing to hold it on though. Then again, the head on a normal bolt that small can't stick out more than 2-3mm surely? Which is better than 12mm? Assuming there's a bit of space on the inside of the dropout(between that and the hub/freewheel/thingo)
Just kind of spewing ideas, not so sure they're any good
It's all good Milks, I have given this far too much thought & you can expect a vastly improved version on my ride asap... :-)
ReplyDelete